What is Simulate365Py?
Simulate365Py is a standalone Python library designed by Simulate 365 to access and interact with DWSIM flowsheets without the need to install DWSIM on your local machine.
Prerequisites
- You have a converging DWSIM flowsheet.
You need basic Python and working DWSIM knowledge to work with the library.
As a beginner, see the Python Tutorial and DWSIM documentation.
- You have a Simulate 365 account
Simulate365Py can only interact with DWSIM flowsheets uploaded on Simulate 365 Dashboard.
To access Dashboard, sign up via simulate365.com/registration/, activate your account and access Dashboard on dashboard.simulate365.com/.
- You have installed Simulate365Py
You need Python version 3.4+ to start with the Simulate365Py installation or higher.
Use the following command to install Simulate365Py:
pip install simulate365pyGetting started with Simulate365Py
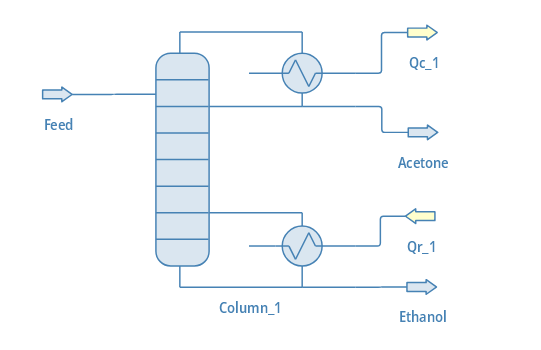
We use a simple flowsheet for the separation of an Acetone-Ethanol mixture to demonstrate how Simulate365Py interacts with DWSIM flowsheets. The following figure shows the Process Flow Diagram (PFD) of the converging flowsheet:
Step 1: Upload the flowsheet to Simulate 365 Dashboard.
Upload a DWSIM flowsheet to Simulate365 Dashboard.
Step 2: Define your input and output parameters
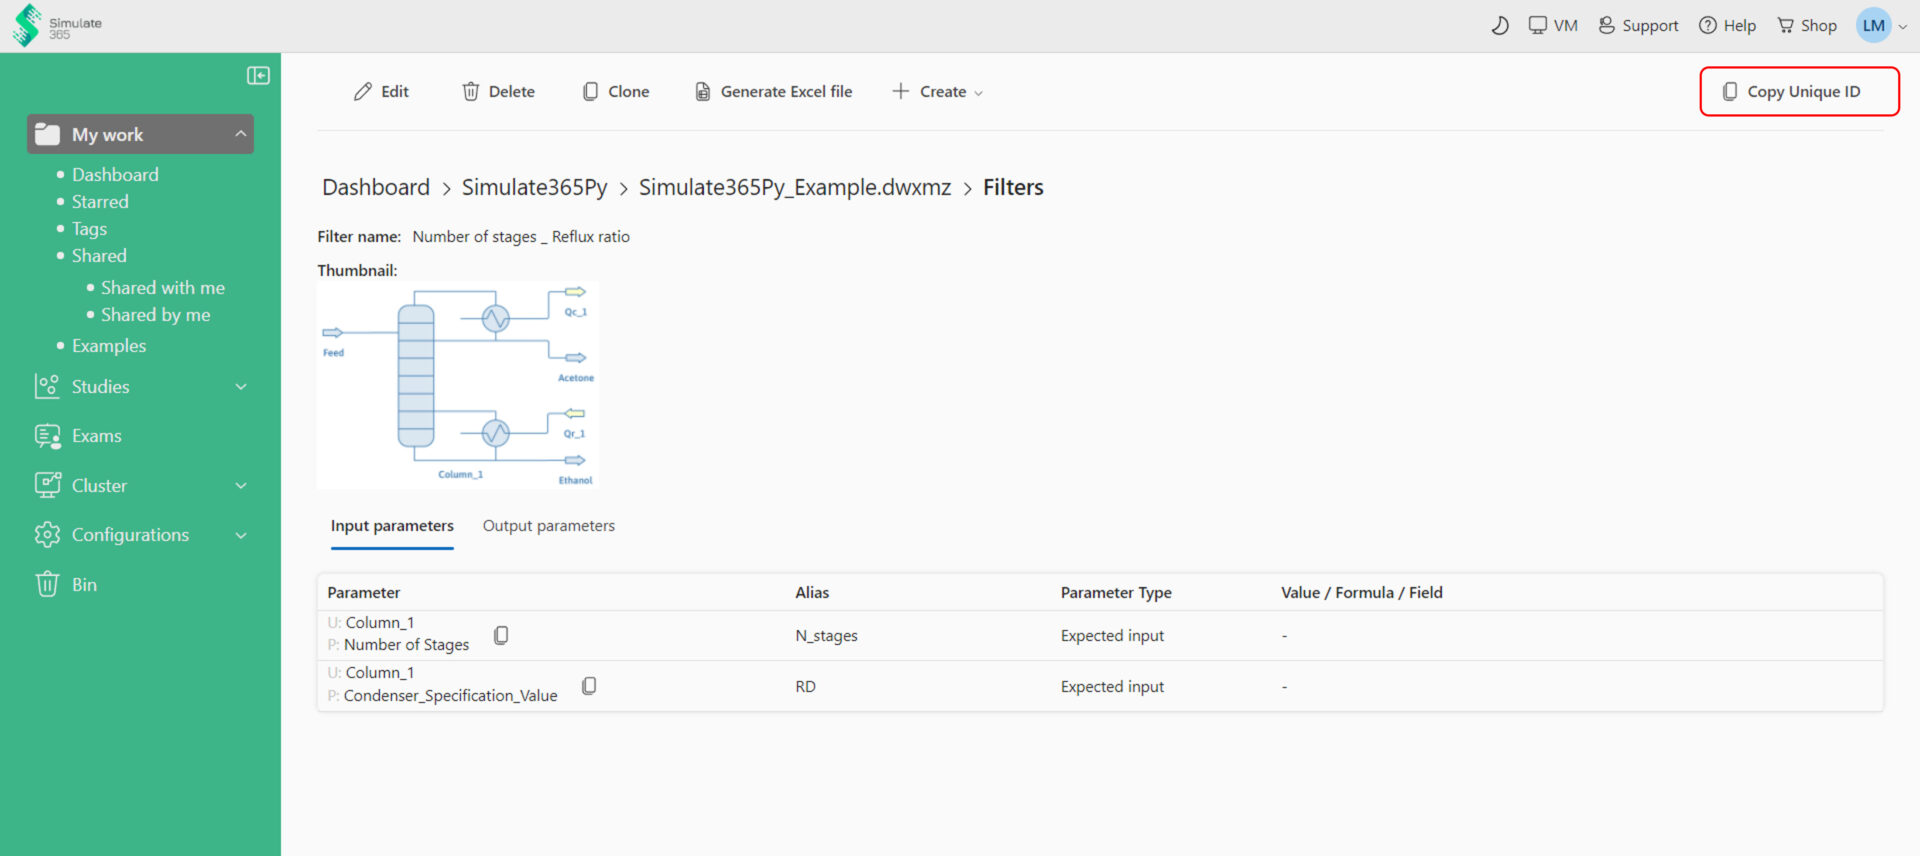
Right-click on your flowsheet and access “Filter” to specify the input and output parameters for the study.
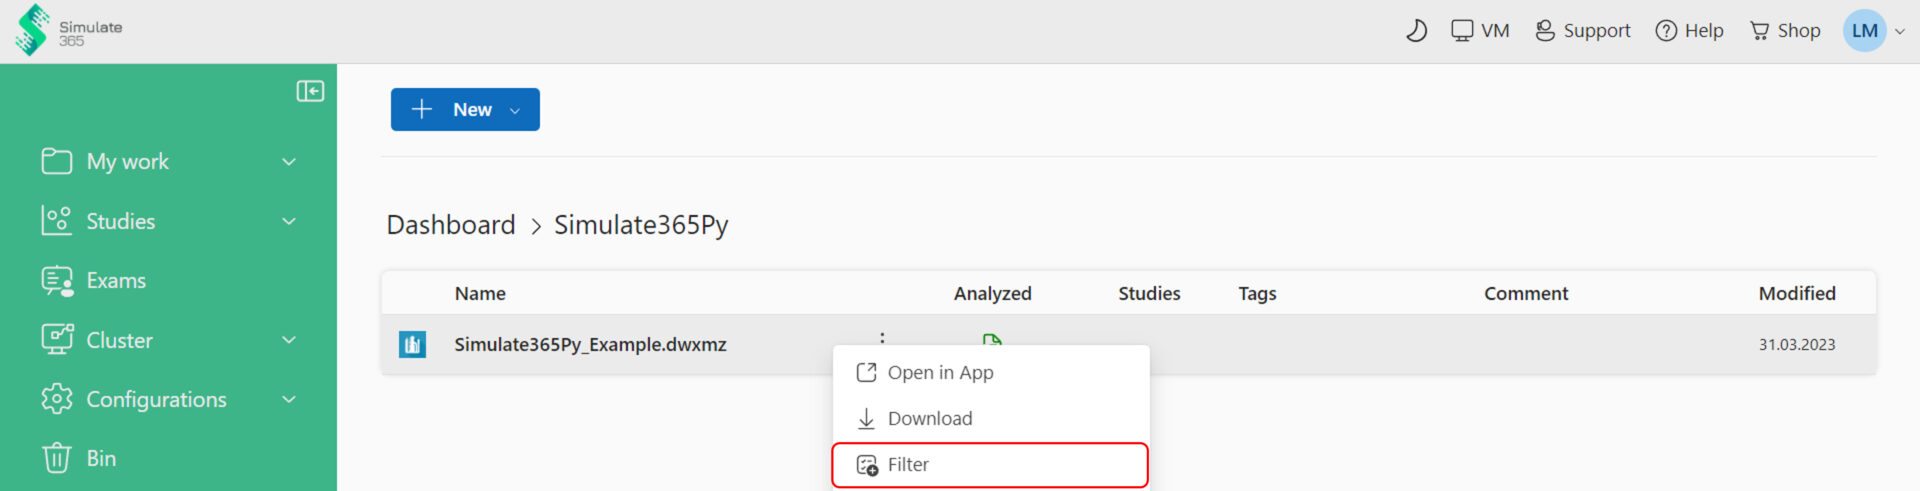
Create a “New Filter” and define a name.
To specify the inputs and outputs, select a Unit Operation or Stream, the desired parameter of the Unit Operation or Stream and define an Alias.
For this example, we want to vary the number of stages and reflux ratio in the distillation column and observe the effect on the acetone and ethanol outlet stream purities.
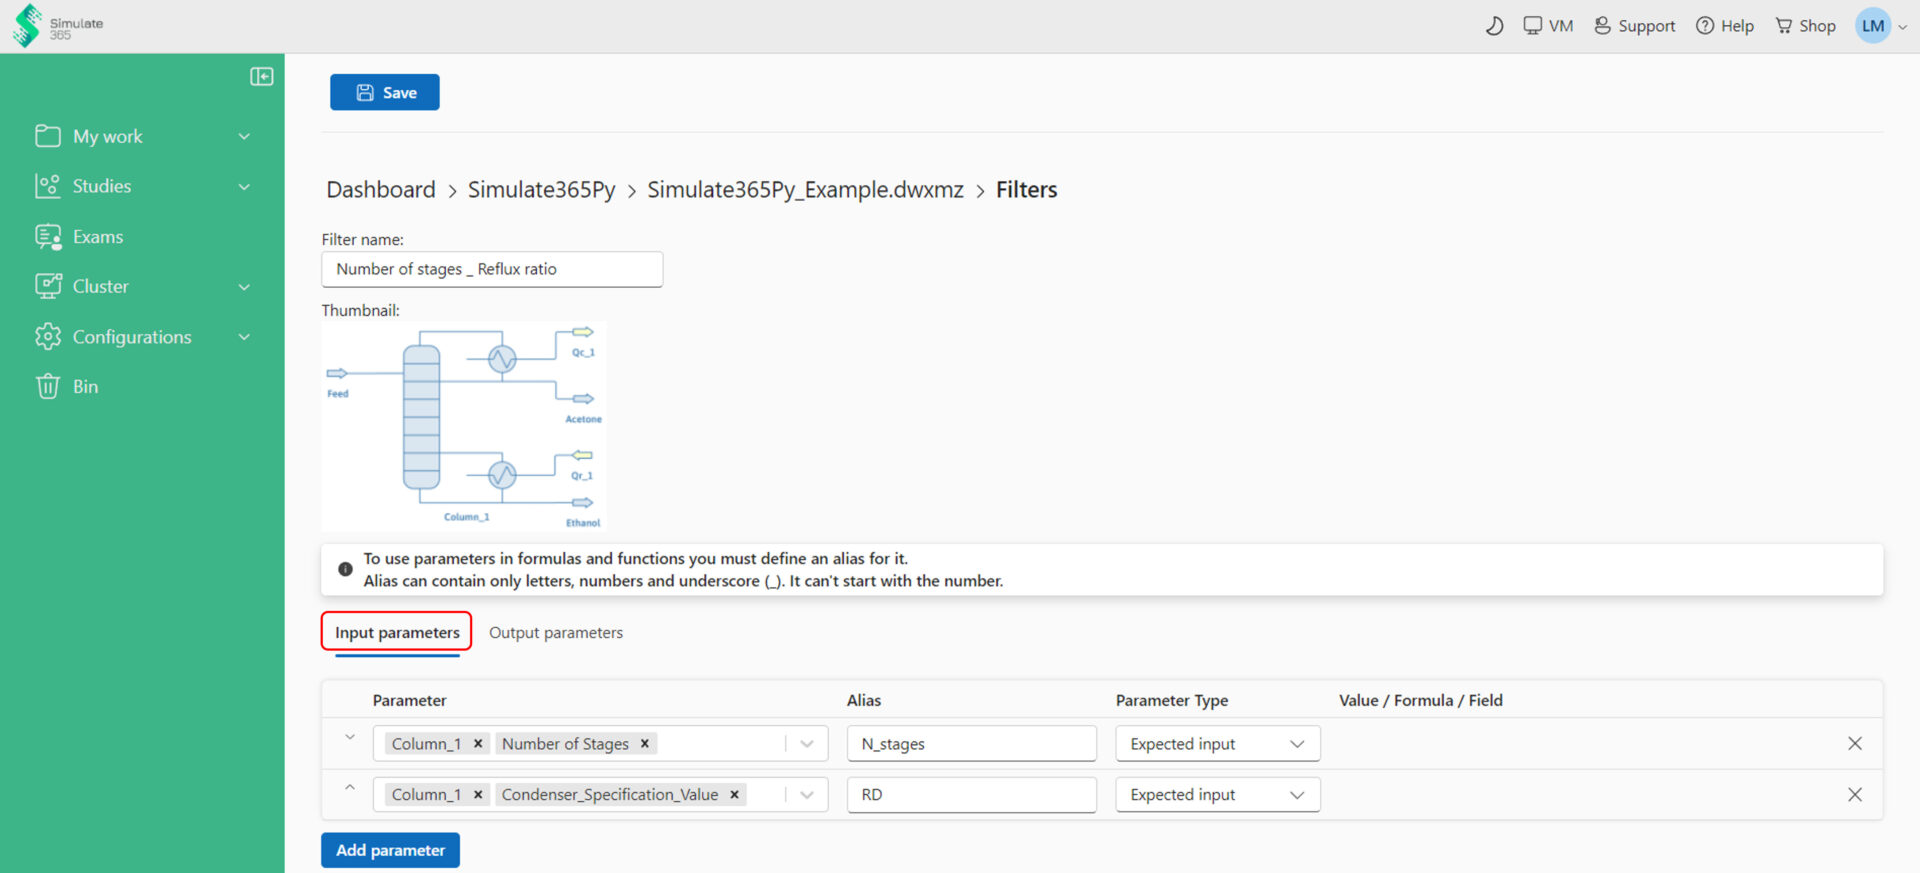

Save the Filter
Step 3: Create the Python script
a) Import the required dependencies of the Simulate365Py library to perform this analysis
import time
from simulate365py import DispatcherClient, NewJobFromFilterPostModel, Environment, JobProcessingStatus
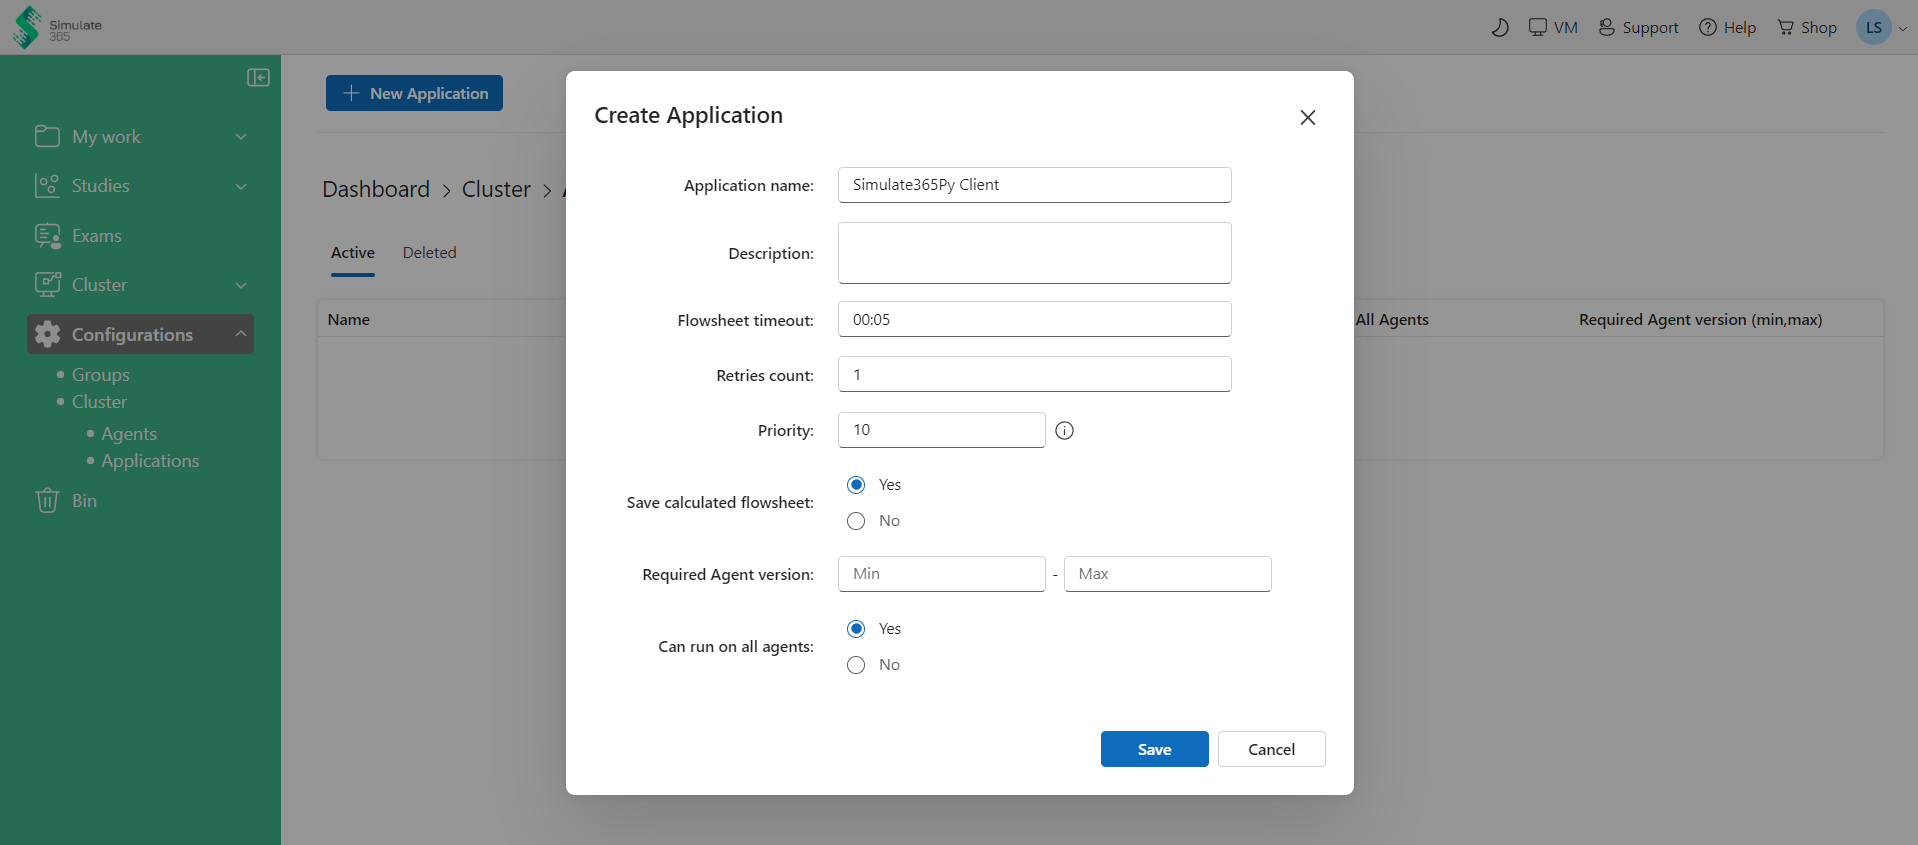
b) Initialize the client using DispatcherClient module from simulate365py library and save it in a variable named client. You will need the API key to create DispatcherClient instance.
On your Simulate 365 Dashboard, go to Configuration -> Cluster -> Applications and create a new application. After you created a new application, the API key can be copied from the application details.
client = DispatcherClient("XXXXXXXX-XXXX-XXXX-XXXX-XXXXXXXXXXXX")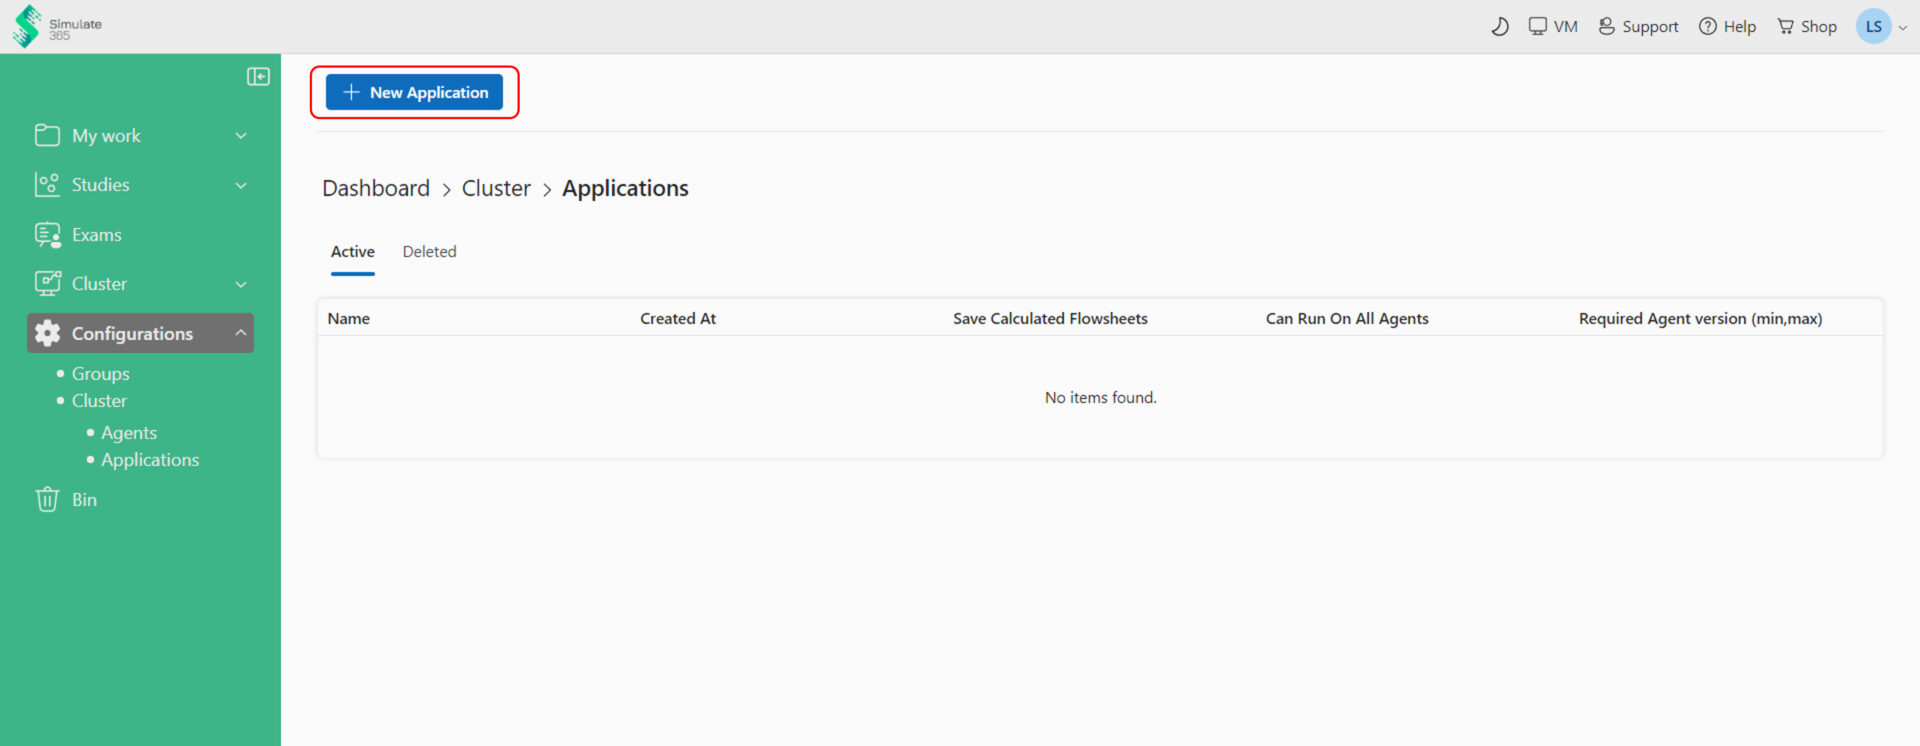
c) Simulate365Py identifies the correct flowsheet and parameters for the calculation on Dashboard using the “Filter Unique Id”. Go to your Filter on Simulate 365 Dashboard (Step 2) and “Copy Unique ID”. Paste the copied value as a string in filter_unique_id variable.
filter_unique_id = "XXXXXXXXXXXXXXXXXXXXXXXXXXXXXXXXXX"
d) Define all input parameters in a dictionary with the Filter alias as key, and the new flowsheet value of each input as value. In this case, we will set the number of stages for the column to be 25 and the reflux ratio to be 3.
{
        "N_stages": 25, # Number of stages
        "RD": 3 # Reflux ratio
 }
e) Create and submit the job using the NewJobPostModel method, which requires the filter_unique_id and input parameters as arguments.
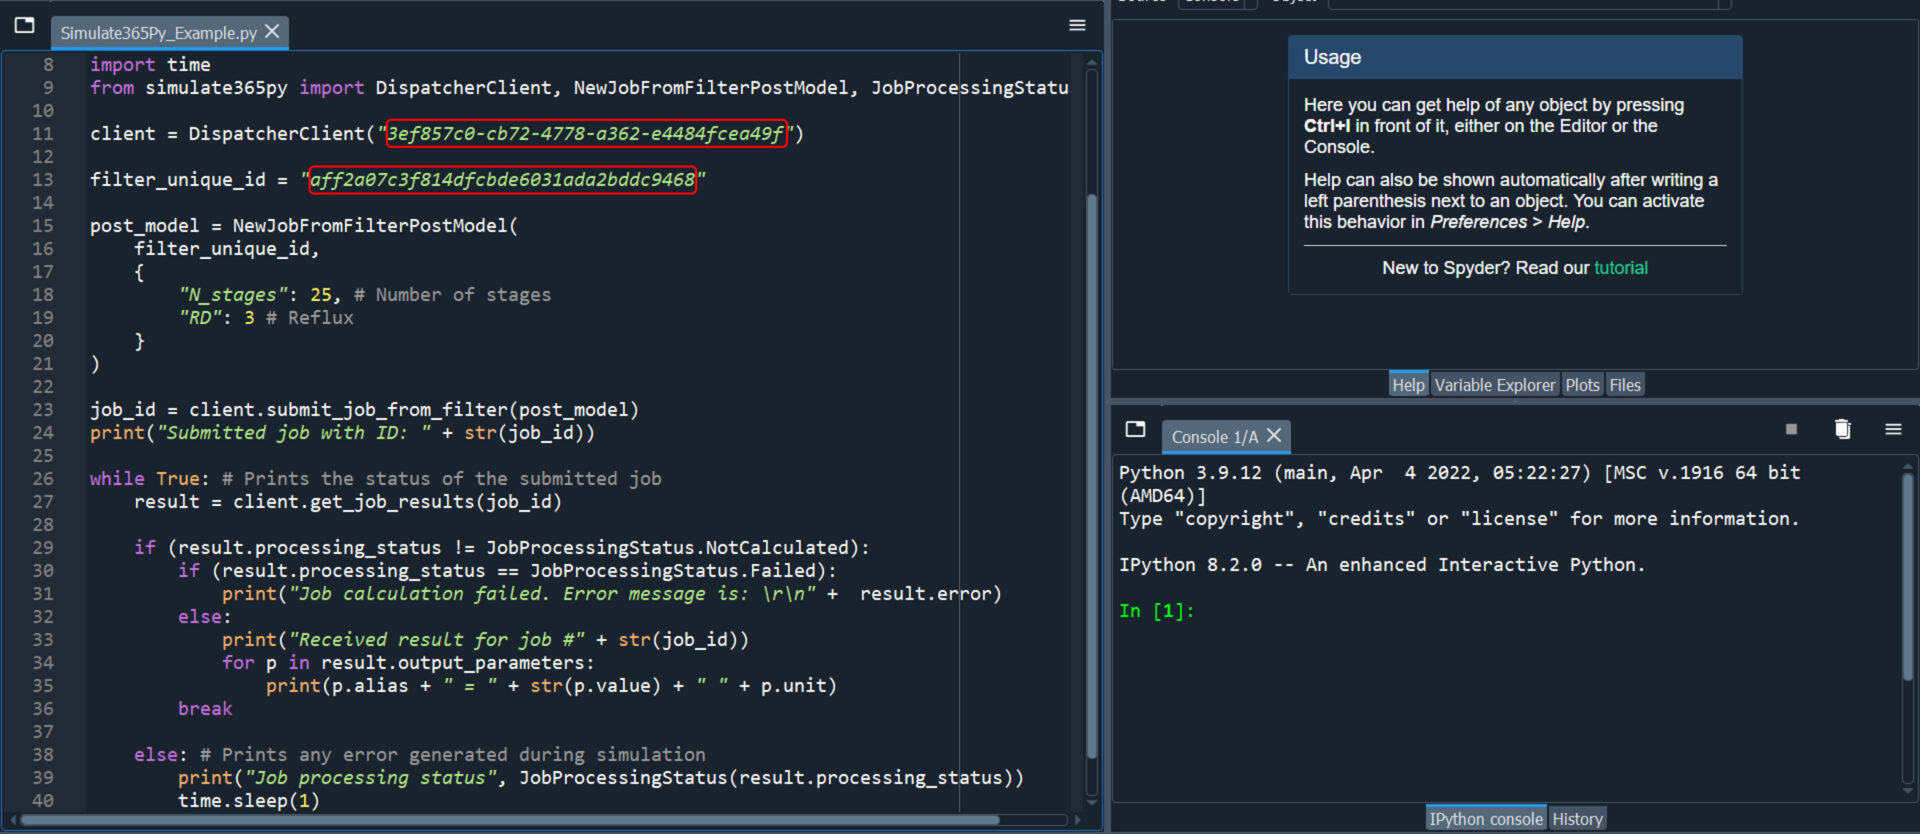
The following block of code creates, processes and submits the job with the new input parameters and prints out the values for the desired output parameters for the new input specifications.
import time
from simulate365py import DispatcherClient, NewJobFromFilterPostModel, JobProcessingStatus

client = DispatcherClient("XXXXXXXX-XXXX-XXXX-XXXX-XXXXXXXXXXXX")

filter_unique_id = "XXXXXXXXXXXXXXXXXXXXXXXXXXXXXXXXXX"

post_model = NewJobFromFilterPostModel(
    filter_unique_id,
    {
        "N_stages": 25, # Number of stages
        "RD": 3 # Reflux ratio
    }
)

job_id = client.submit_job_from_filter(post_model)
print("Submitted job with ID: " + str(job_id))

while True: # Prints the status of the submitted job
    result = client.get_job_results(job_id)

    if (result.processing_status != JobProcessingStatus.NotCalculated):
        if (result.processing_status == JobProcessingStatus.Failed):
            print("Job calculation failed. Error message is: \r\n" +  result.error)
        else:
            print("Received result for job #" + str(job_id))
            for p in result.output_parameters:
                print(p.alias + " = " + str(p.value) + " " + p.unit)
        break

    else: # Prints any error generated during simulation
        print("Job processing status", JobProcessingStatus(result.processing_status))
        time.sleep(1)