What is the THEE?
Take-Home Exercise/Exam (THEE) is an online assessment tool for teaching process simulation. It allows to create individualized exercises and exams for students based on one flowsheet.
Who can benefit from THEE?
THEE is useful for supporting teachers who want to:
- Create individual homework for students during the semester.
- Assess the developed simulation skills at the end of the semester in the form of a practical exam.
- Provide the opportunity for students to work on their simulation skills besides the lectures and seminars in the form of free exercises.
Getting Started with THEE
- You have a converging DWSIM flowsheet.
- You have a Simulate 365 account
THEE can only interact with DWSIM flowsheets uploaded on Simulate 365 Dashboard.
To access Dashboard, register on simulate365.com/registration/, activate your account and access Dashboard on dashboard.simulate365.com/. - You have got your THEE access in the shop
Login to Simulate 365 to find the Product. You can get a 2-week free trial to try THEE.
Tutorial
We will use the example flowsheet of the Styrene reactor to demonstrate how to create your THEE. The following figure shows the Process Flow Diagram (PFD) of the converging flowsheet.

Step 1: Upload the DWSIM flowsheet
Upload a DWSIM flowsheet to Simulate365 Dashboard and let it analyze.
Step 2: Create a Filter for each exercise to specify the input and output parameters
- Right-click on your flowsheet and access “Filter” to specify the input and output parameters for the study.
- Create a “New Filter” and define a name.
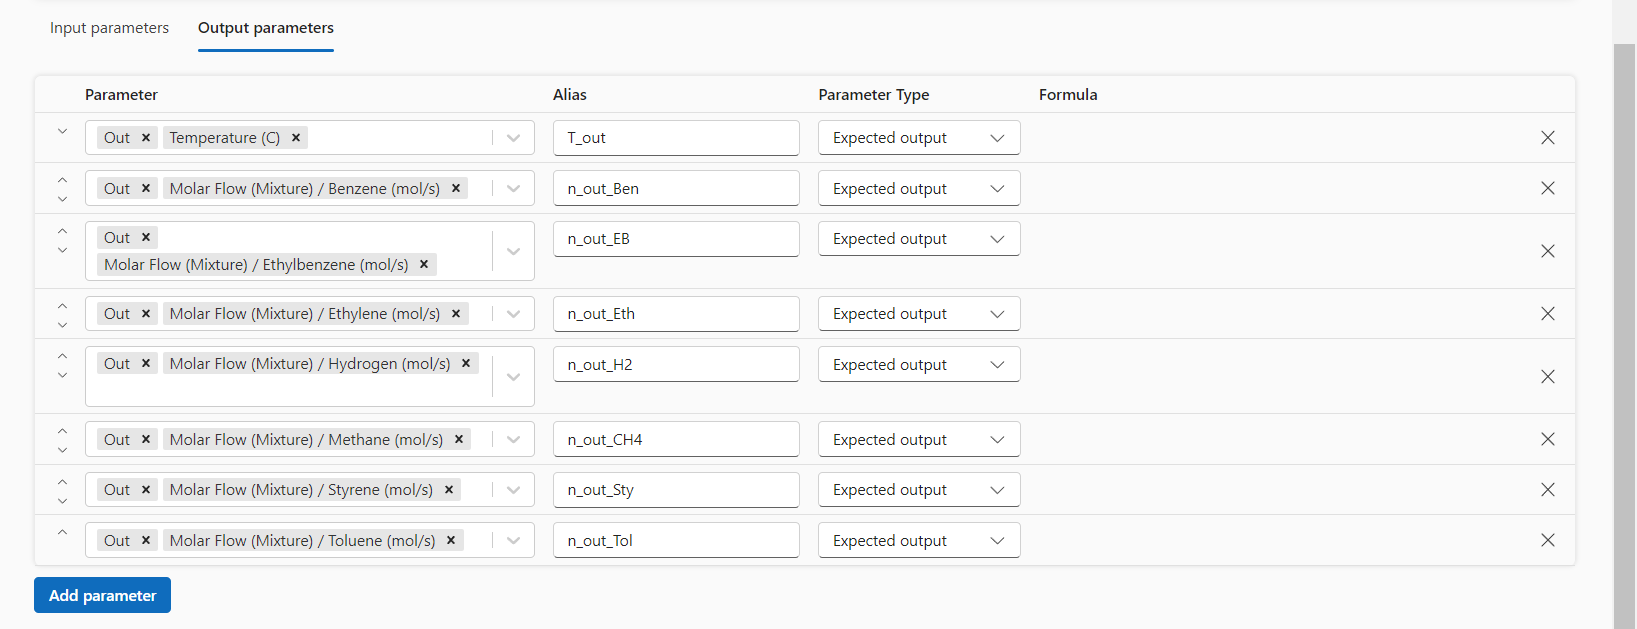
- To specify the inputs and outputs, select a Unit Operation or Stream, the desired parameter of the Unit Operation or Stream and define an Alias. In this example, we use the feed molar flow, feed temperature and Heat duty of the reactor as inputs. As outputs, we define the outlet temperature and the outlet molar flows of all components to calculate the conversion, selectivity and yield.

- Save the Filter
Step 3: Generate data for each exercise using the Design of Experiments (DoE)
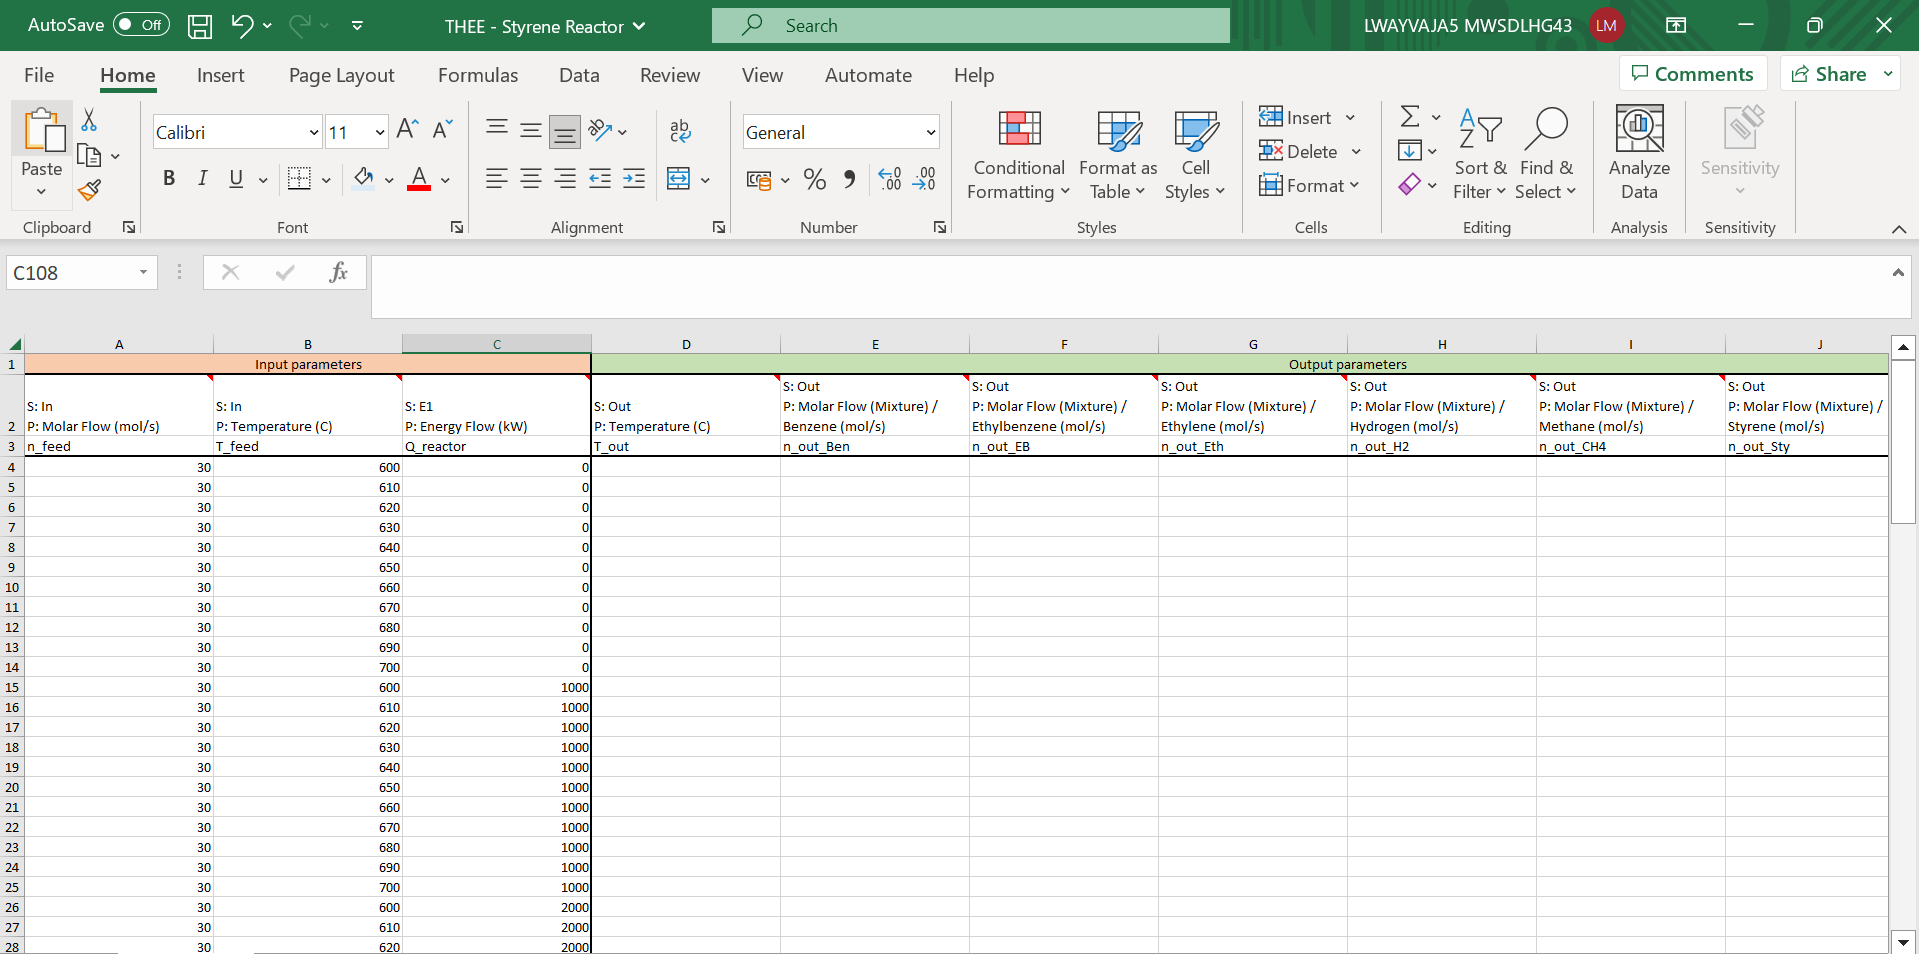
- Generate an Excel file from your Filter or upload your own Excel file containing all input and output parameters for your exercises.
- Fill in the input data. Each row in the Excel file represents one individual student exercise and upload the file to Dashboard.
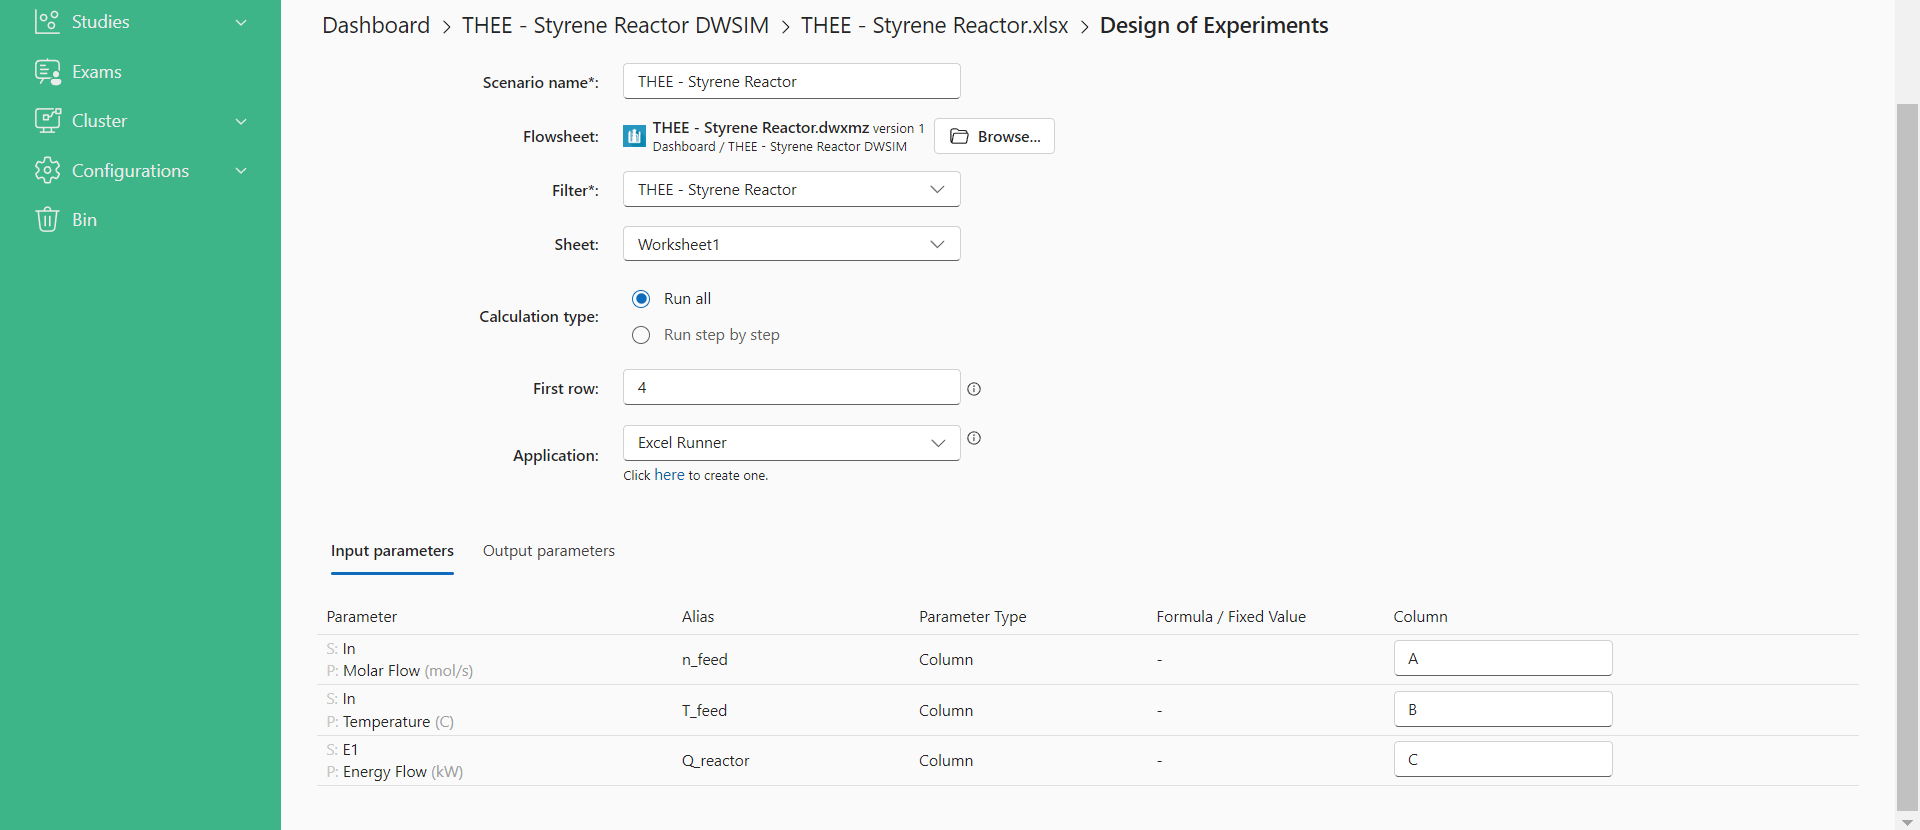
- Access Design of Experiments via right-click on your Excel file.
- Select a name, your flowsheet and the corresponding exercise Filter and an Application. The Application allows you to define configurations for your calculations.
- Select the corresponding column for each input and output from your Excel file.

- Save the scenario to start the calculations.
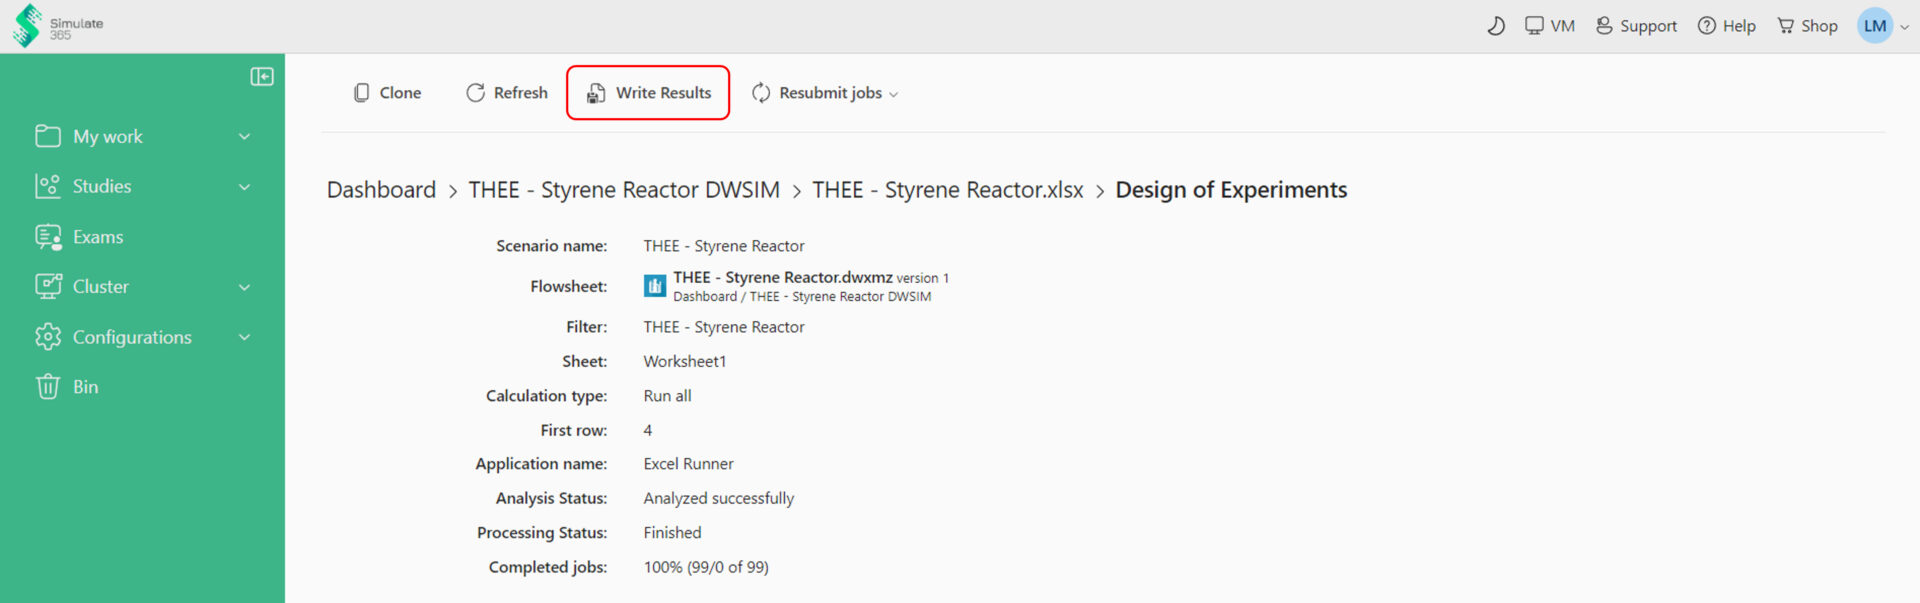
- After your calculation is finished, go to your scenario Details and “Write results”, so that your generated output data is written to the Excel file.
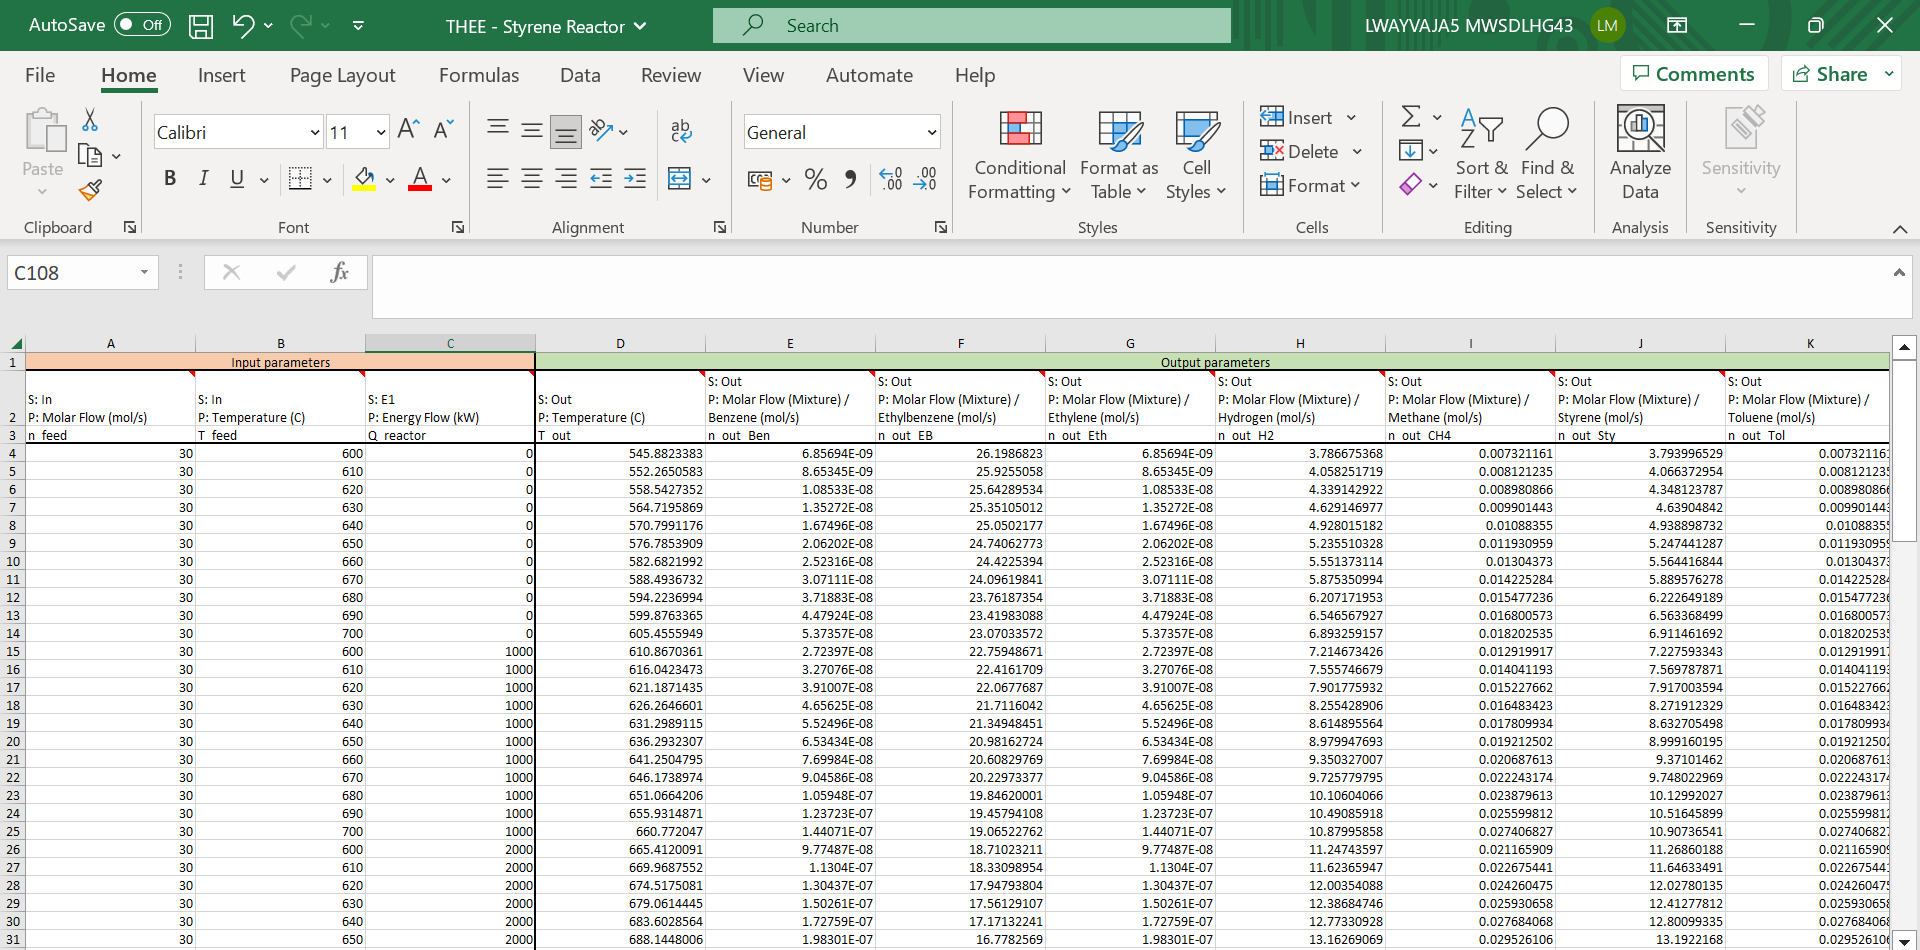
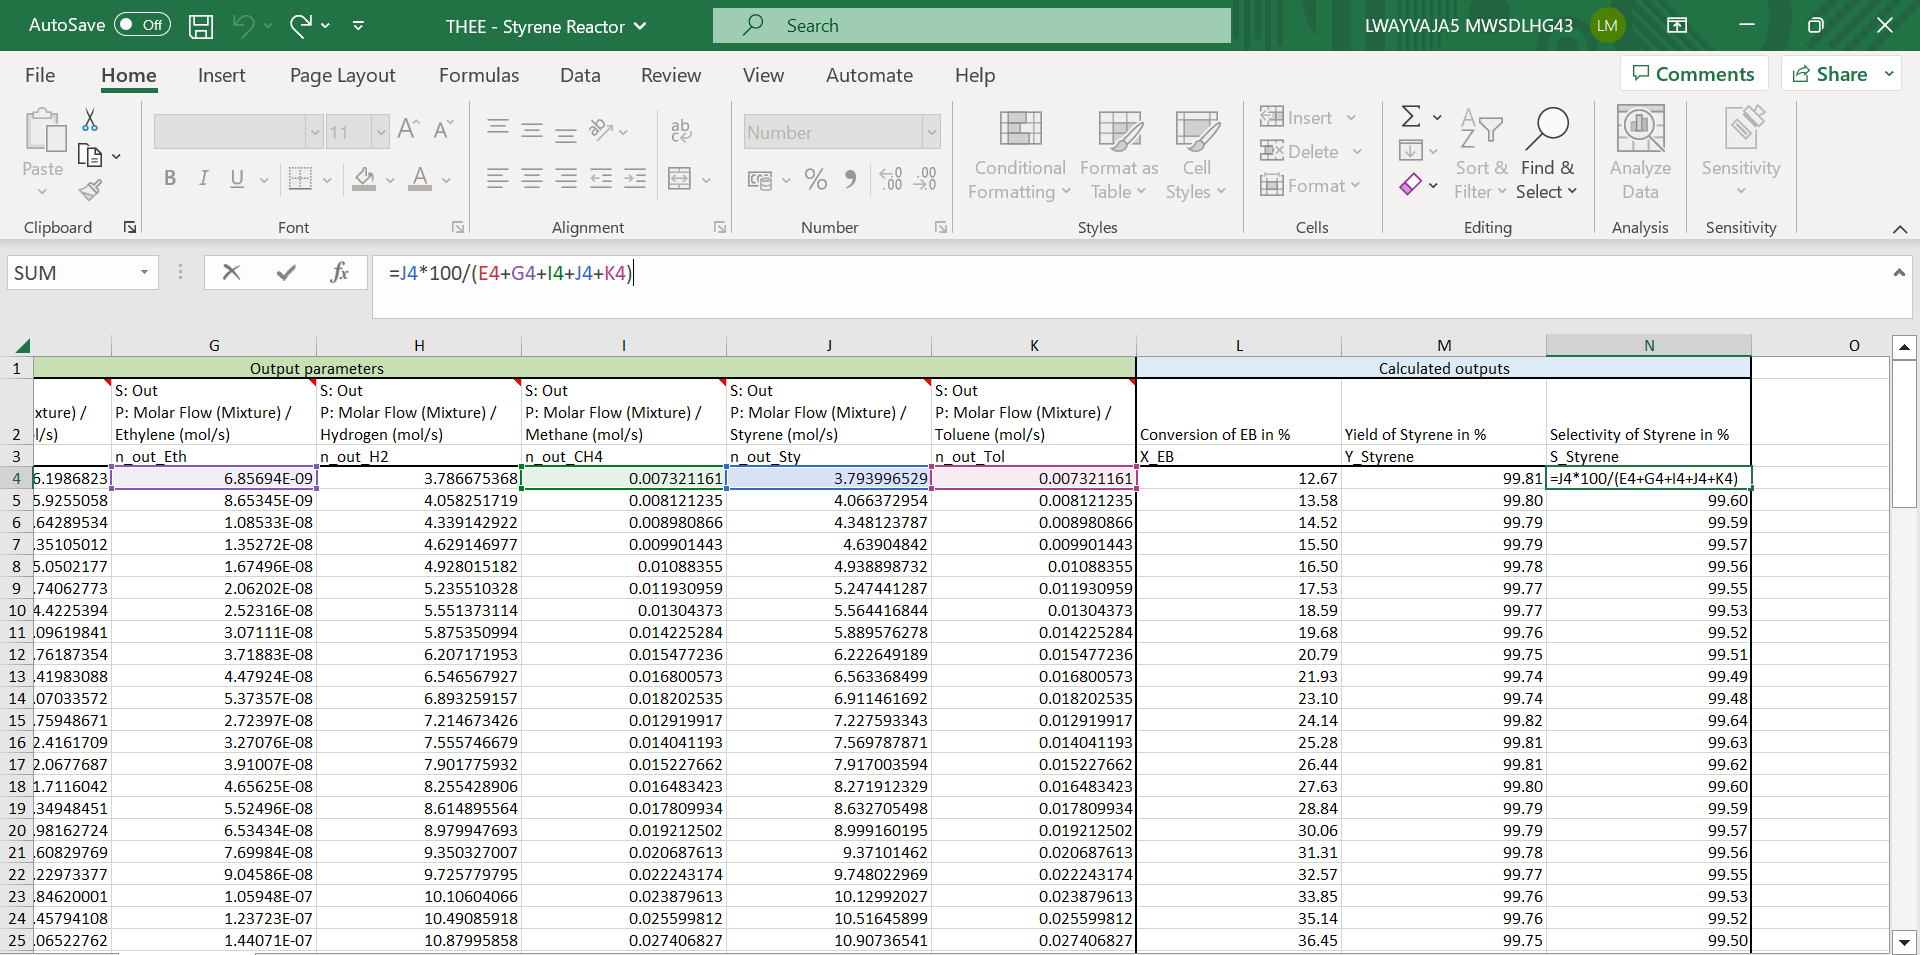
- With your calculated results, you can add any outputs, like the conversion of Ethylbenzene and selectivity and yield of Styrene, directly in the Excel file to prepare your exam.
- Repeat this step for all exercises you want to add to your Exam in the same Excel file. All input and output data for each exercise should be saved in one worksheet.
Step 4: Create a student group
- Go to Configurations -> Groups and create a group with your students
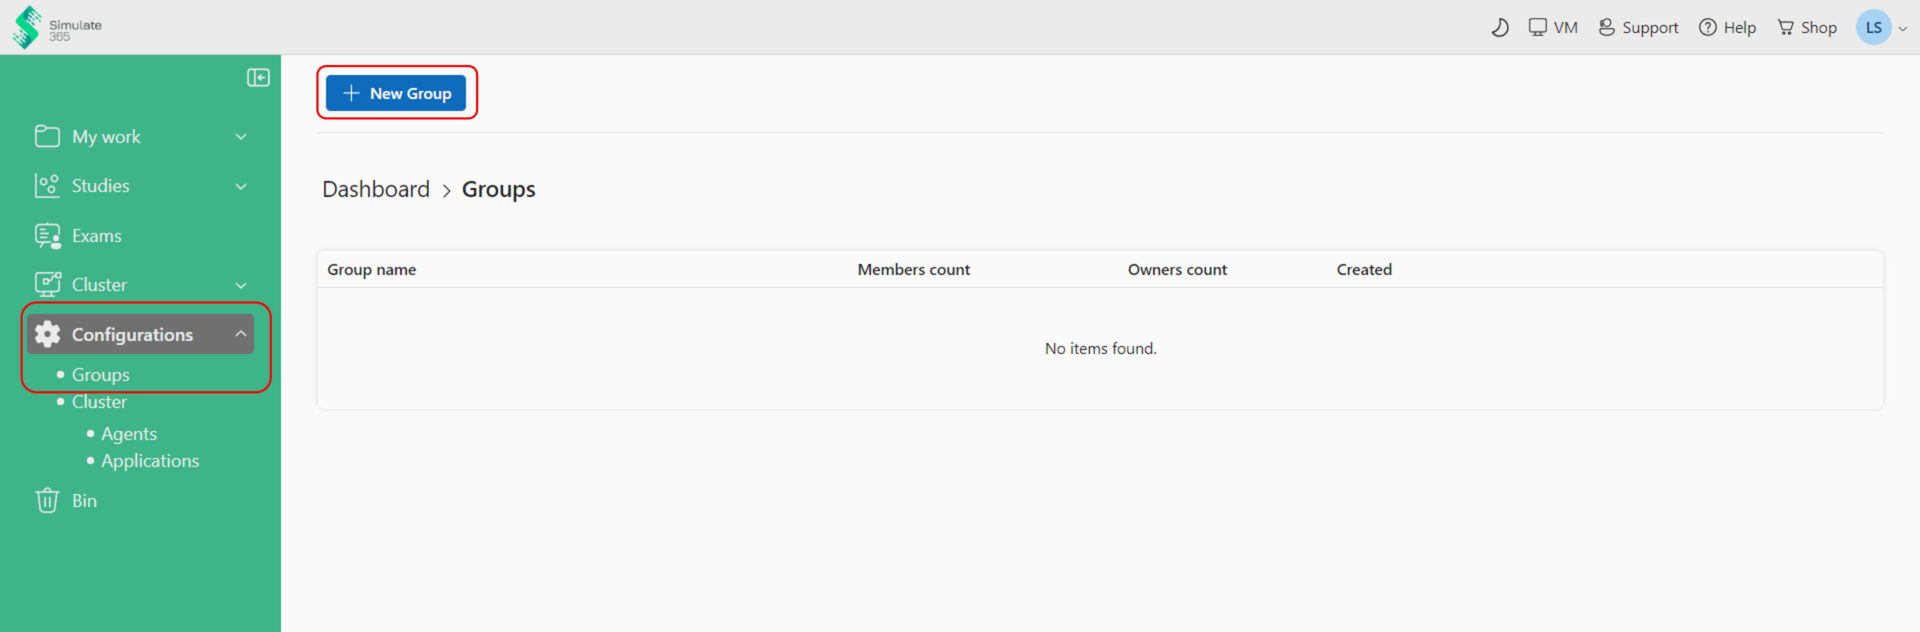
- Note: You can only add people from your organization, meaning people who signed up with e.g. your university e-mail address.
Step 5: Create the Exam
- The Excel file containing all calculations for each Exercise (see Step 3) is the data matrix that your exam is created on.
- Right-click on your Excel file and go to “Exams”.
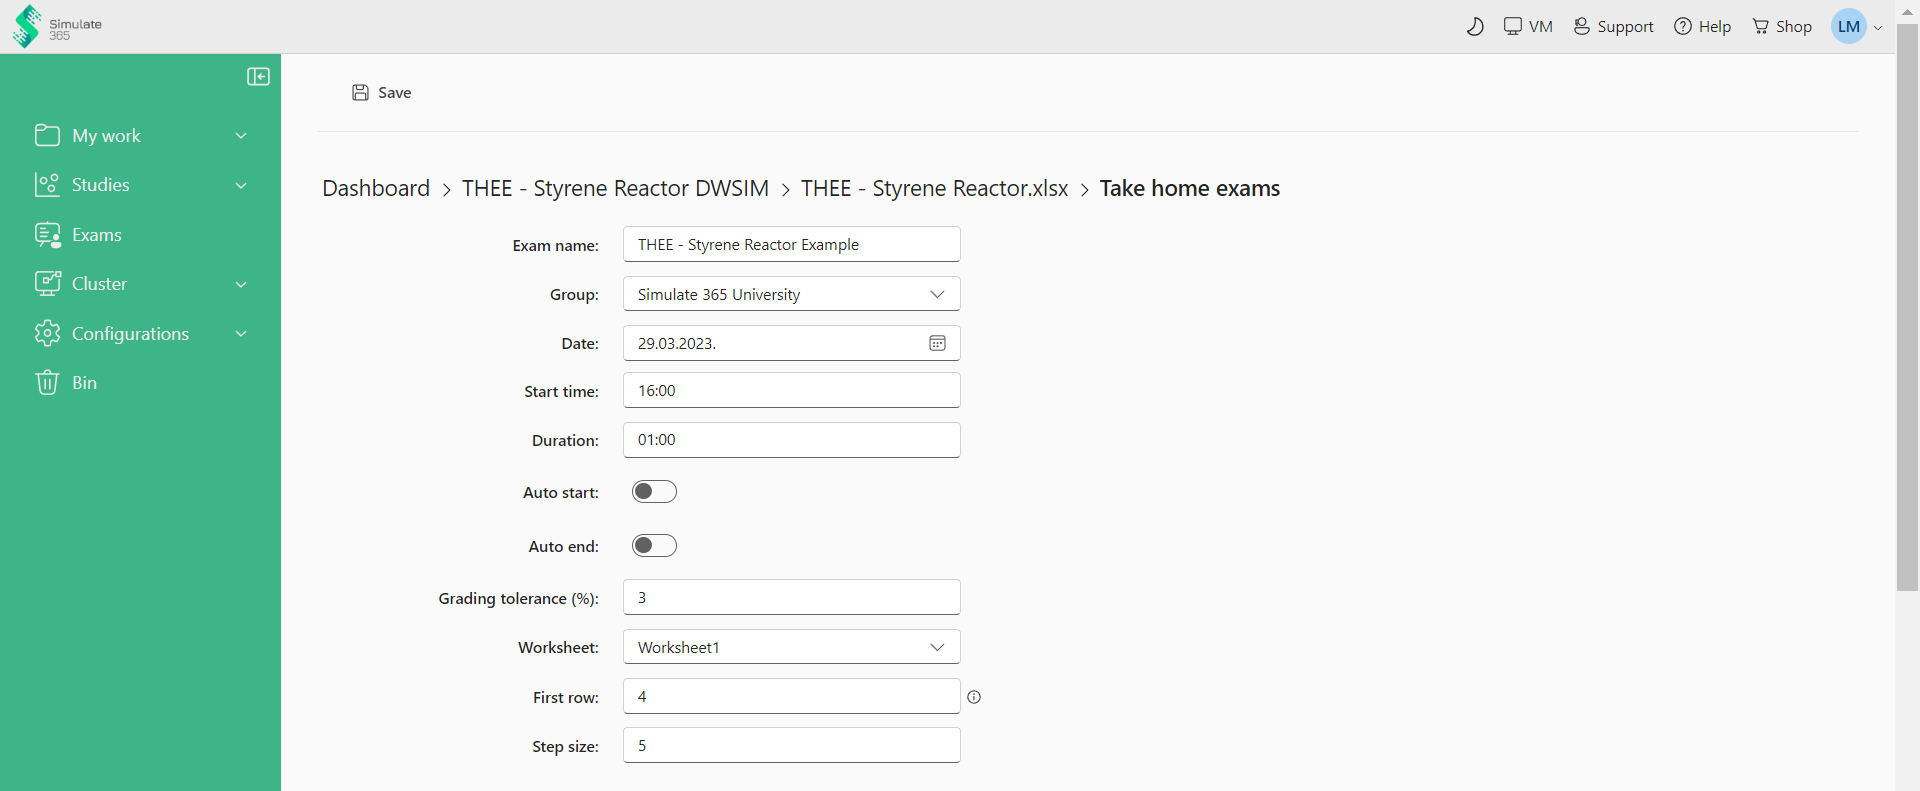
- Create a new Exam, select your student group, exam date and duration. The grading tolerance indicates by how much percent the answers from each student can differ from the values in your data matrix (e.g. due to flowsheet stability, numerical deviations). Define from which row the data should be selected (First row) and the step size X. The data set for the first student is sampled starting in the “First row” and for each further student in the row X steps after the previous data set. This view is called the Exam admin.
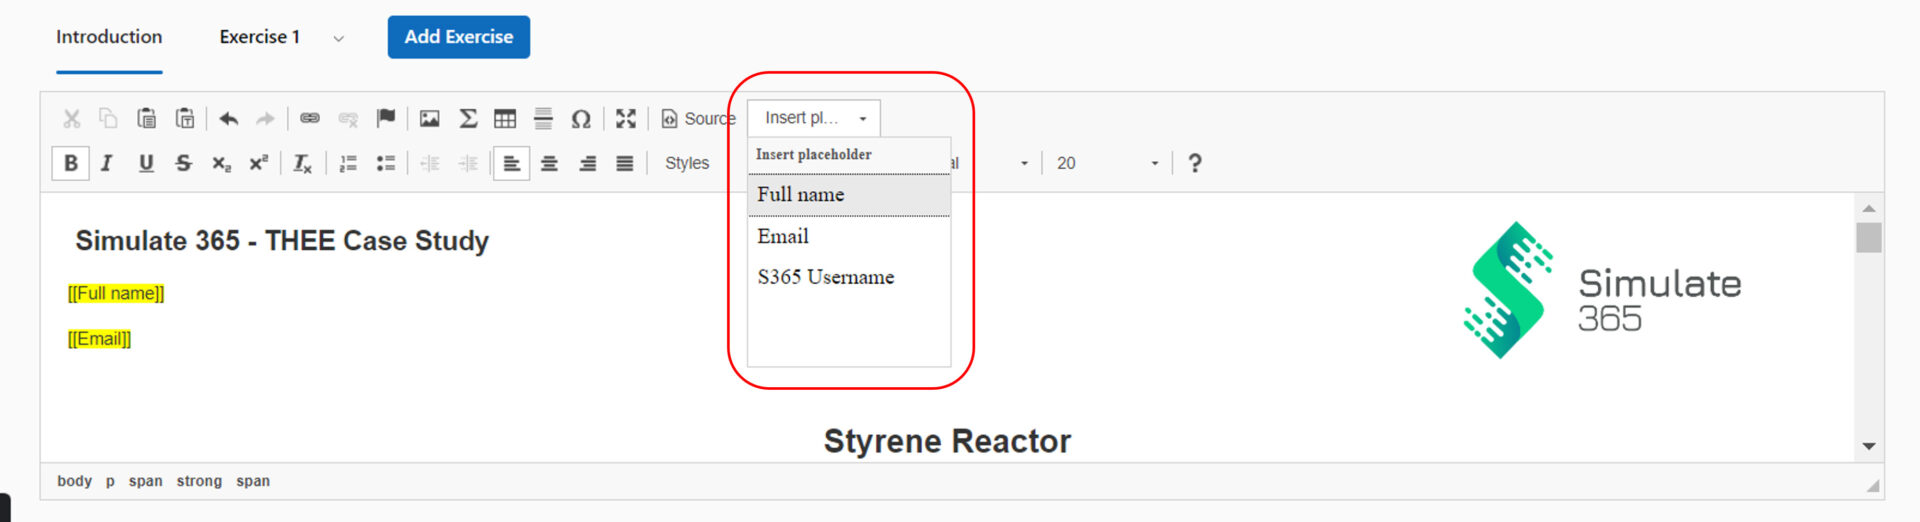
- Design your Exam description in “Introduction”. Insert your students individual names and mail addresses using the “Insert placeholders”.
- Create your exercises.
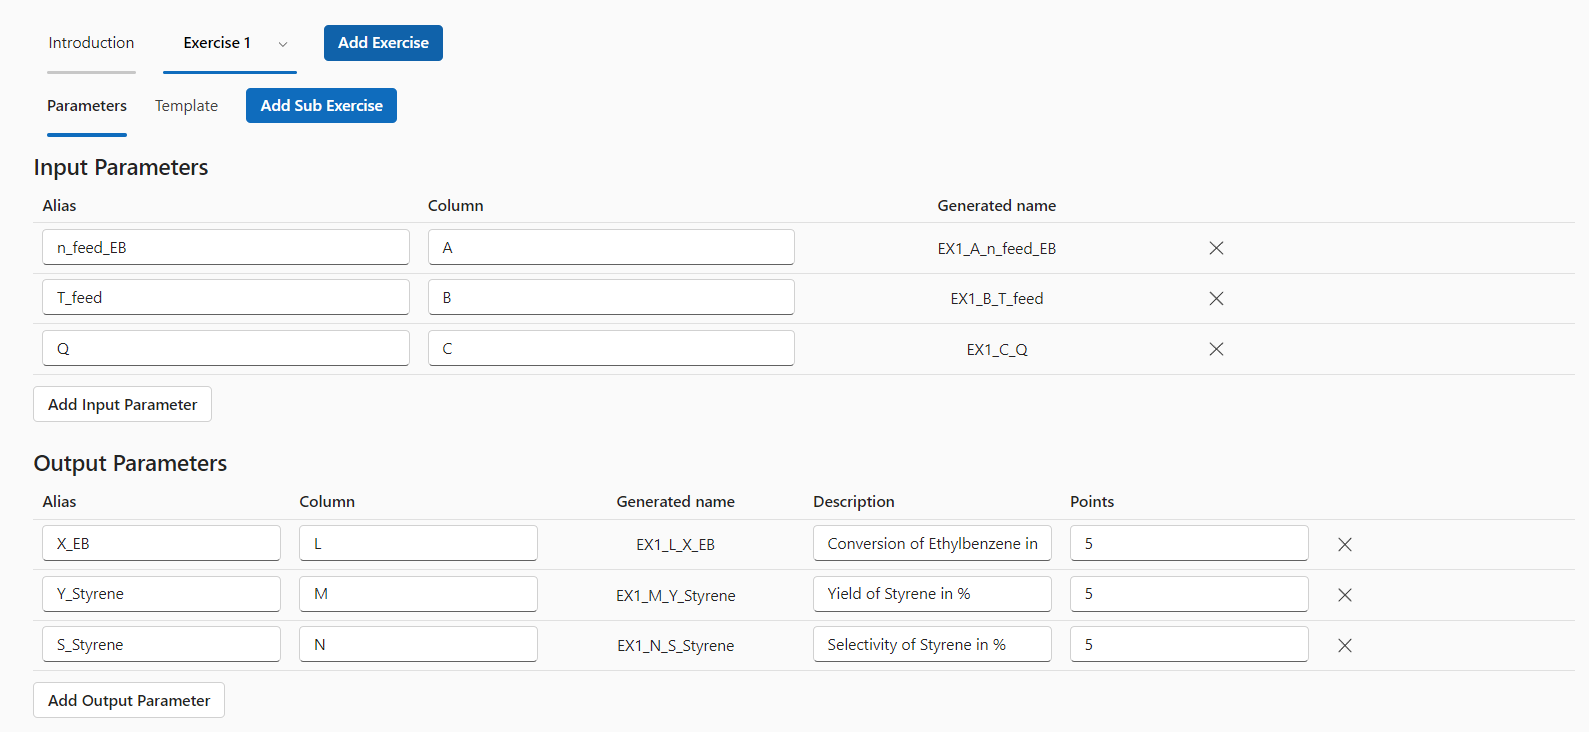
- For each exercise, your can define the input and output parameters from your Excel file. For each input, select an alias and the corresponding column in the Excel file. For each output, select the column, define the description that is shown to the student and the number of points awarded to the output.
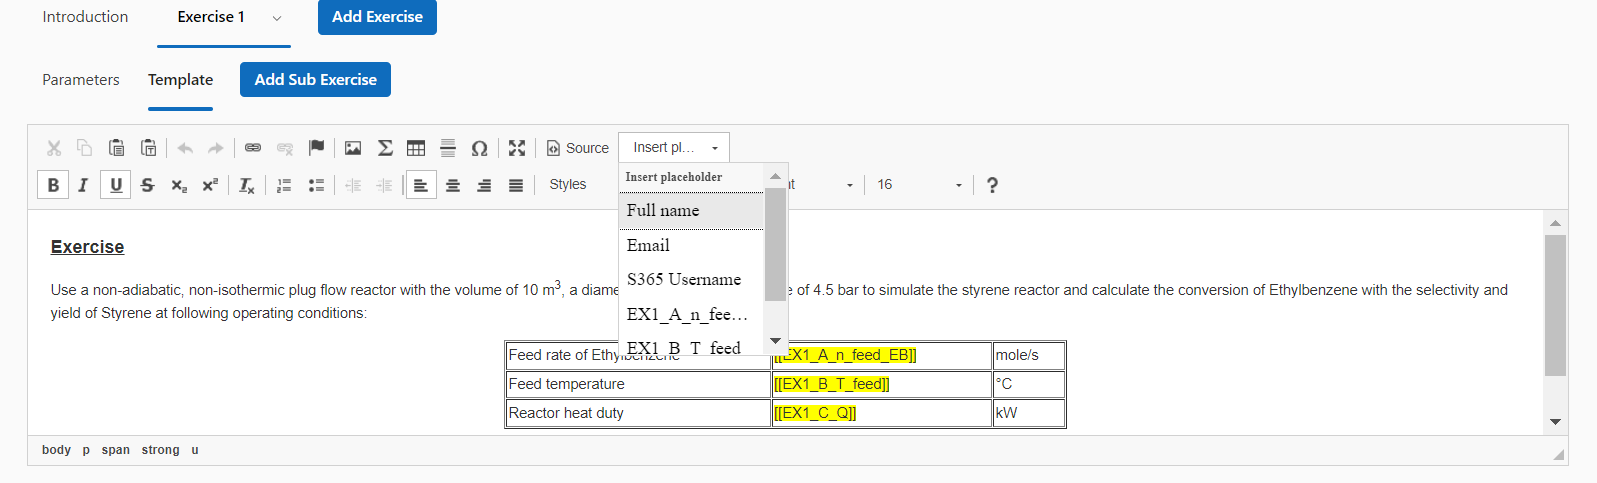
- Define the exercise text and insert placeholders for the students’ individual inputs.
- Save the exam and “View Details” to access the Exam Admin.
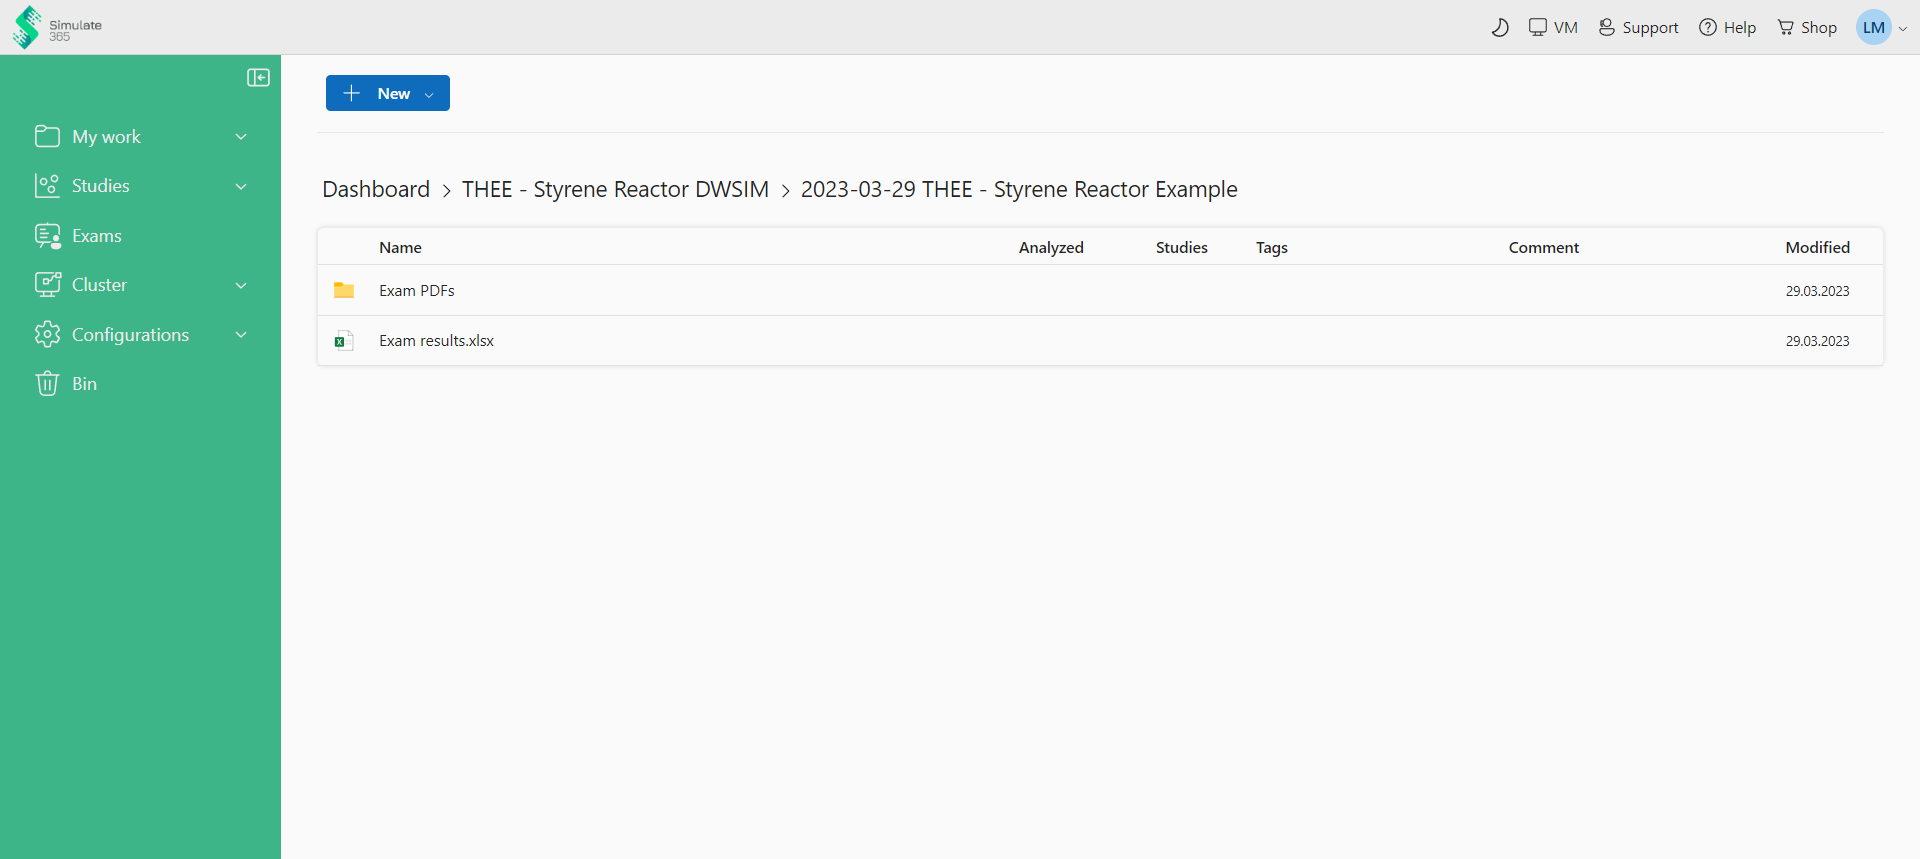
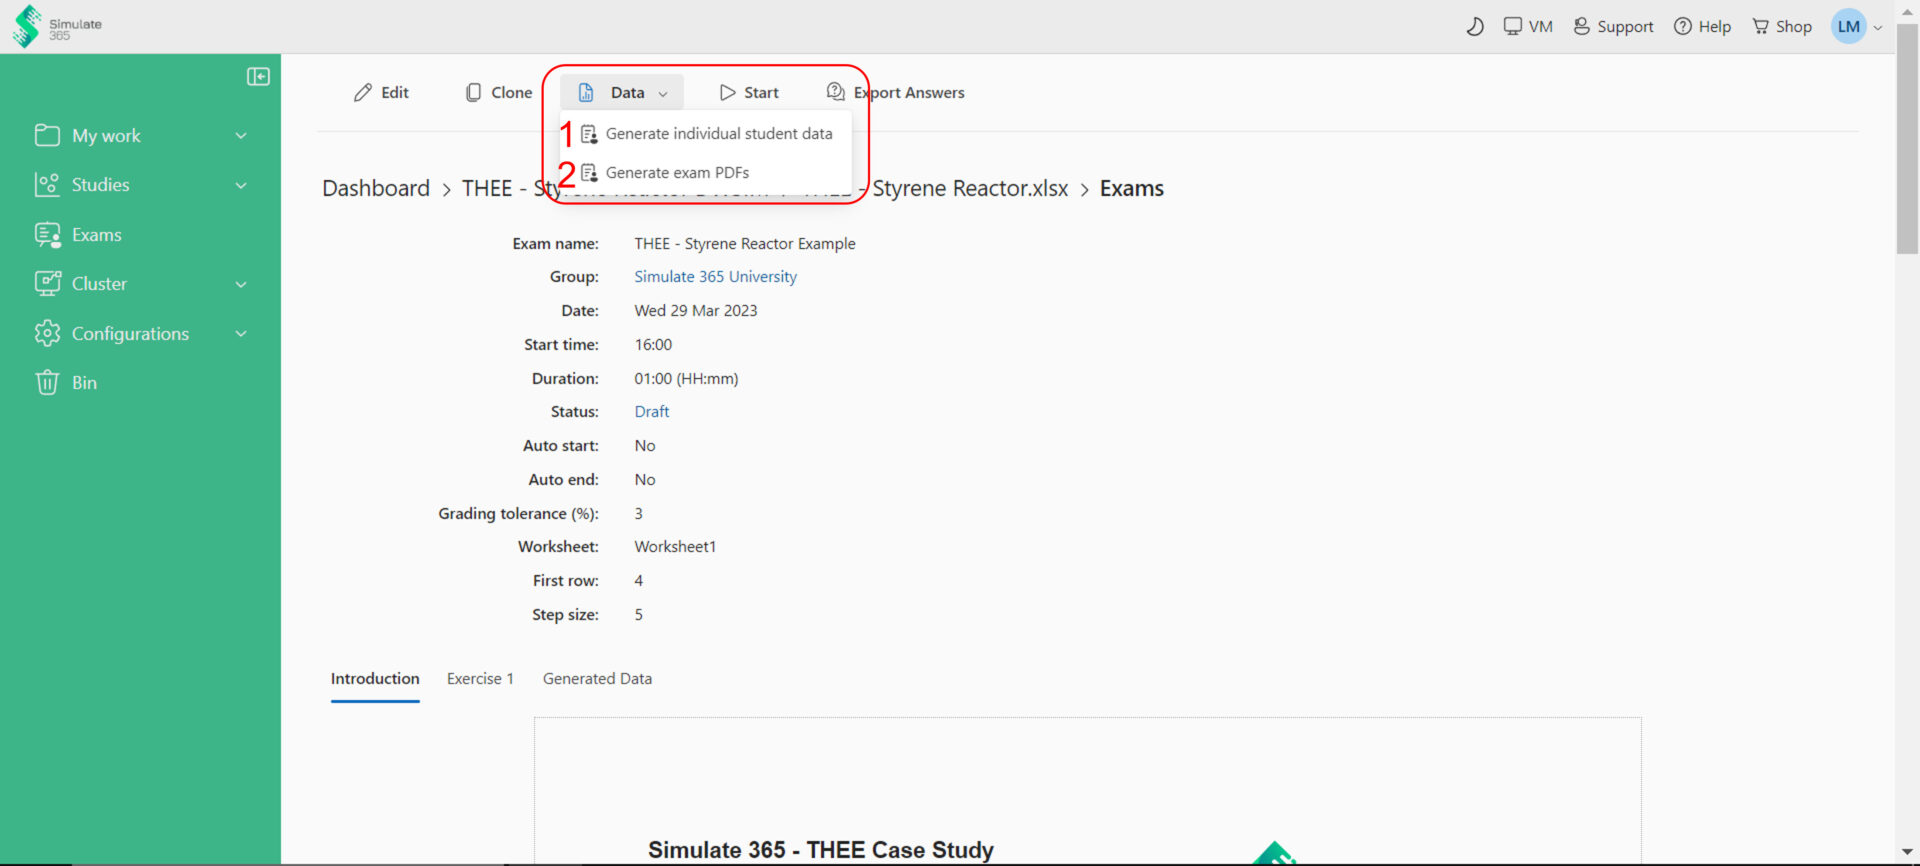
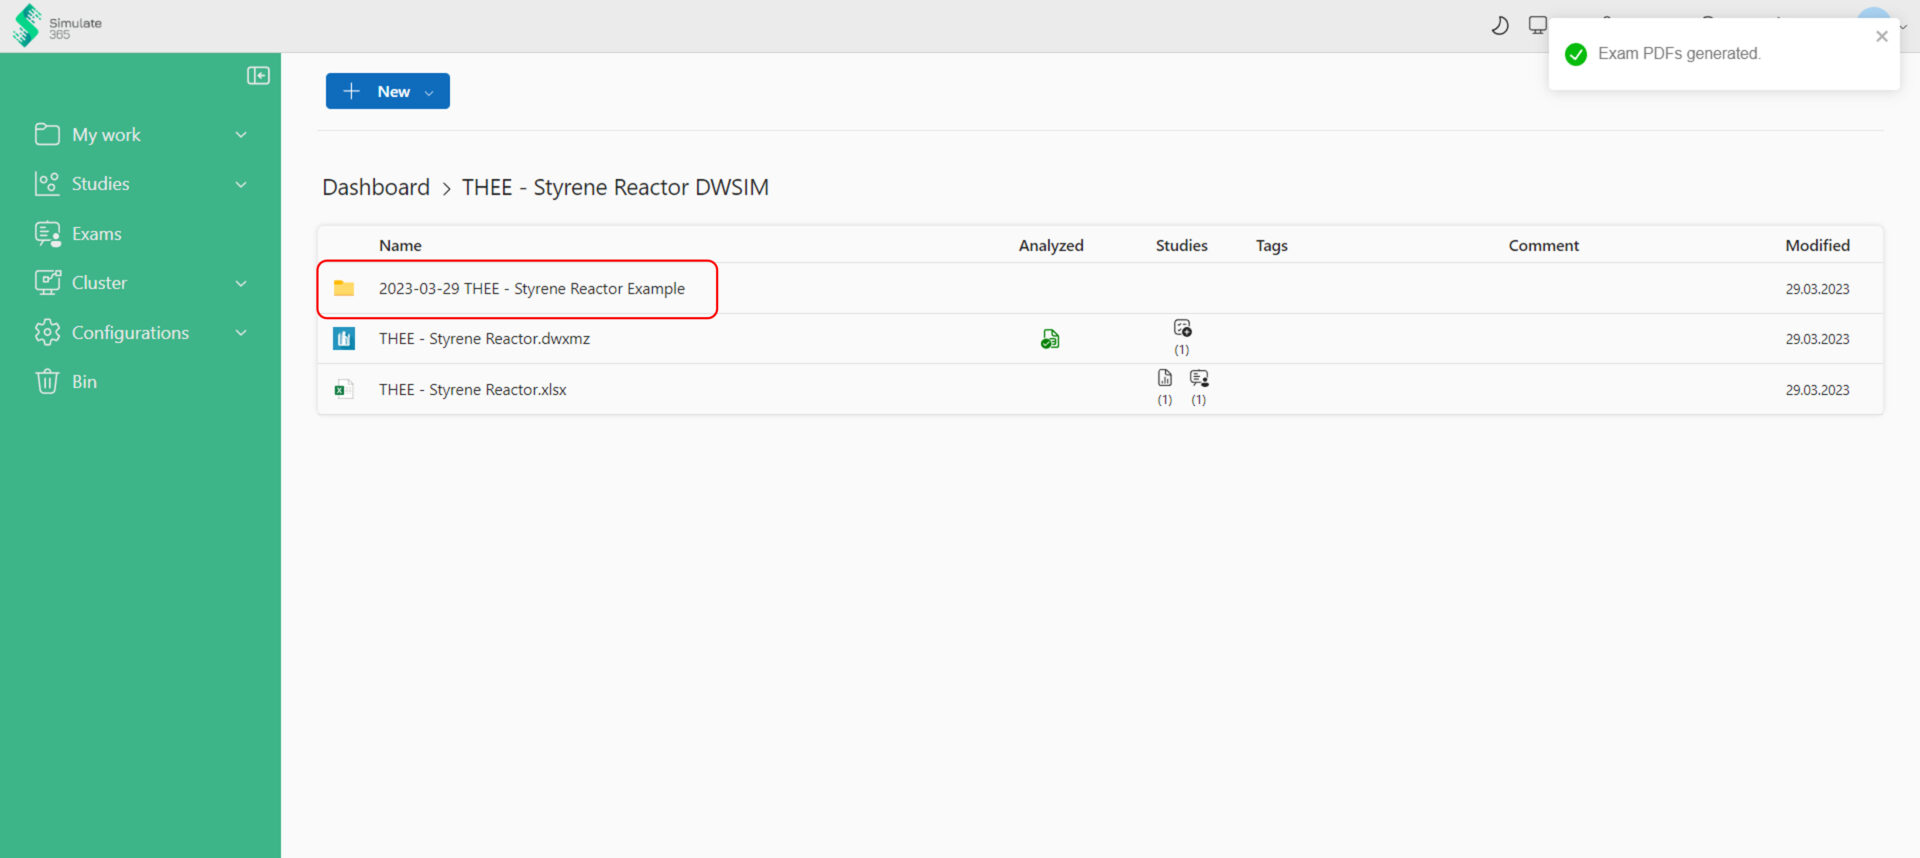
- Under “Data”, generate the individual student data and then generate the individual exam PDFs. The exam PDFs will be stored in an individual folder on your Dashboard including the date and name of your Exam.
- Note: You can update and change your exam at any point before you start it. After changes and before starting the exam, always generate the individual student data and the exam PDFs.
Step 6: Start the exam
- Start your exam from the Exam Admin.
- The exam will be shared automatically with each student and they can submit answers from the “Exam” view in the sidebar of their own Dashboard.
Step 7: End the exam and collect the results
- End the exam from the Exam Admin
- “Export answers” to save your students’ results to the exam folder where the exam PDFs are also stored.